Tuesday 19 May 2015

Elite Dangerous Space Bar - Economic Armaments


Hey space cadets what is going on?
I'm Cmdr TwingTwang and welcome to the space bar.

This is just a quick update about the Economic Armaments community goal at Hamilton Gateway that has been lighting up Galnet.


At the time of writing, the goal has just passed Tier Two and the rewards are starting to rack up, with a 3% Diamondback discount already waiting for me there is every incentive to keep farming the metals and bringing home the bacon.

As the Community Goal is still relatively new, it was very quick to get up into the top 15% but as the tiers progress it'll take some serious trading to hang in there ... but I don't see this goal lasting a full nine more days from today and a second trading session should be enough to get a foothold in the higher reward brackets.

The sporty looking diamondback is the latest offering from Lakon Spaceways, and is set to be a fine addition to any pilots collection. Speculation is running wild - I'm hoping for a mid sized blockade runner in the fifty million range with enough hardpoints for it to be taken seriously.
I talked about building a blockade runner from a Lakon Sixer in my Lakon Type-6 outfitters article, and I really like the idea of a dedicated multipurpose ship - kind of like a big brother to the Asp.

Are you a fan of community goals? Is the look of the new diamondback enough to capture your interest or do you have another ship in mind?  Is a 3% discount enough to make you join in? How much would it take?

I've been Cmdr TwingTwang, reporting from Hamilton Gateway in Wolf 406 where things are heating up. Fly Casual, pilots.

Sunday 17 May 2015

Elite Dangerous Outfitters - Vulture Revisited


Hey Space Cadets what is going on?
I'm Cmdr TwingTwang and welcome to the outfitters.


Today we'll be talking about the Vulture again. The Vulture is a space superiority starfighter that offers great performance and manoeuvrability.  Ballparking at around twenty million credits once equipped the Vulture also boasts incredible value for money in combat providing unparalleled bang for the buck.


In my first Vulture Outfitters article I gave my first impressions of the ship and  I had time to return to the vulture after a long time flying other ships and I've got to say I'm still impressed. The vulture turns on a dime, and while it's not super fast on the straight it is no slouch when it comes to holding position in combat. Most recently I've also been flying a sidewinder and a lot of the lessons I learned in the Vulture helped me in the sidewinder, and vice-versa.

General Loadout
I'm going to assume at this point that you have a Vulture to hand and enough money to fit Class-A Power Plant, Distributor, Thrusters and Shields.  My sensors and life support are D to save power and the Frame Shift is in power group 2, so inactive during combat.

This means you should look something like this before you start outfitting:

BH: 1I Lightweight Alloy
RB: 4A Power Plant
TM: 5A Thrusters
FH: 4A Frame Shift Drive
EC: 3D Life Support
PC: 5A Power Distributor
SS: 4D Sensors
FS: 3C Fuel Tank (Capacity: 8)

That build is going to total just under fifteen million, and leave you plenty of spending money for shields, weapons and toys.

Power Management
Like the viper - or any other fighter - the Vulture is really limited by its power plant. Even the 4A only gives you 15.6 MW to play with so you have to balance your priorities carefully but since your FSD can safely power down when the hardpoints deploy you can use the full 15.6 on your combat loadout. It only saves you an extra 0.45 but every little helps.

This Vulture build was designed with some of the community goal conflict zones in mind, so I've chosen a Class-D Life Support that runs all the time, instead of a Class-A that gets shut off when the hardpoints deploy.  An escort fighter can deal with the short flight time caused by the life support cutting out but a warship needs to stay in the fight a lot longer.

Hard choices in hard points
In my previous vulture outfits, I've been using paired C3 Gimbal Beams, dual E3 Gimbal Burst and dual E3 Gimbal Pulse Lasers.  Going back to the sidewinder has taught me to fly with fixed lasers again, and after trying several loadouts I flew my sidewinder with a fixed beam and gimbal cannon and had a lot of success with that combo.  The fixed beam allows you to track your target and ignore chaff, and the cannon allows you to start really tearing into the hull once the shields go down.

The dual gimbal burst lasers I used before are a quality compromise, and don't have the punch of the beams but only draw 1.65MW each - still a massive 3.3MW energy budget for weapons.

Dual C3 Gimbal Beams are only a fraction higher at 3.56MW, but drain the banks faster and overheat more readily.  In a long fight, your overheating beams will cut out and reduce your damage output so it might be that the lower rated burst lasers actually fare better. In addition, you'll have to reduce your shields or thrusters to find the power to run them.

The higher damage per second means the C3 Fixed beams cost a fraction more energy, and since the Vulture has no trouble staying on target they are a good contender, however having at least one gimbal really helps you target submodules for power plant takedowns so I've moved to asymmetric options.

The next option is the high power Beam+Plasma option. Costing 3.75MW it's not much more expensive than dual beams, and really does the damage. I found that heat problems upset me here, and while I dished out a lot of damage I also took quite a lashing as I had to use a lower-grade shield. Overall I didn't feel as comfortable using plasma - smaller targets were literally hit or miss, too often miss... Meanwhile against bigger ships like anacondas I found the my ship got super hot, and thermal overload shut down both weapons leaving me sitting duck in my reduced power shields.

Flying the vulture with a C3 Gimbal Beam and a C3 Gimbal Cannon worked out really well for me, and it's a tough call to say if I preferred it to dual burst lasers. Your beam laser is slower at slicing through shields, but the gimbal really helps it lock on to ship modules and get power-plants quickly too. The Gimbal Cannon is great at wrecking hulls, and can try to target modules too. This combo takes only 2.53MW which is a huge advantage and saves you an extra MW to for other systems.

I found the gimbal frag cannon pretty good too. Its damage output at point blank range is scary good and its at that range you can afford the fixed-forward, which I think uses a lot less power. The gimbal cannon felt like it hit ship submodules, while the fragger doesn't really do anything that precise. Again this is a fairly low power combo at 2.8MW but I think I just preferred the straight cannon on the Vulture.

A note on the Gimbal beam is that it can struggle to track, especially against chaffing cobras. Just untarget the ship and it'll revert to fixed-forward, allowing you to line up your shot and keep dealing damage until the chaff expires.  I found the cannon doesn't suffer from this so much, as you will only shoot when you have a clear line of fire and by the time you open up the cannon your quarry will often have burned through their chaff. You can often just wait for the chaff to expire too, and use the chance to refill your laser banks and let your smoking guns cool down.

Lastly, if you are building an escort fighter or bounty hunter for a wing then a Class-A life support that powers down when the hardpoints deploy should be fine as you'll be returning to the station to collect the bounty anyway.  In a ship like this, I'l might pick the fragger instead of the cannon, as you will have time to reload and want to maximise your damage per second.

Thrusters
Soaking up a massive 6MW, the 5A thrusters eat your energy budget for breakfast and while you can save about 0.5MW for each grade you drop down I didn't fare as well with 5B thrusters so wasn't encouraged to fly with the 5Cs. It may be a placebo effect, and I've not done any serious instrumentation on their performance but even with the smidgeon of extra power you can throw into weapons or shields I found that Manoeuvring with the 5A was just that much better, so I'm going to keep recommending them.
I tend to divert power to engines to top the capacitor ready for a boost but rarely fly with more than one pip in engines, better power management helps.

I'd be interested in doing some instrumented tests on the difference between the 5B and 5A thrusters, because if the difference is slight, then the extra power may be better used elsewhere, but I ~felt~ better with the 5A which is all I've got to go on so far.

Shield Options
One trick I developed from flying a sidewinder recently is that you can afford to have an extra shield booster (or two) in power group 2. They will be powered down when your guns are out but you can stow your hardpoints and get an extra 20% shields strength (or more). This is super useful if you are trying to get out of the line of fire, or if you know you won't need to shoot for five seconds.

I tried a build without Shield Banks, which is a difficult decision.  In the vulture I'm rarely getting tagged so their main use is to increase your income by staying in the fight non-stop.  However I'm not flying the Vulture for the income, so don't mind holding my position for a minute and letting the shields restore before I get back into the fray. If you are a big PVP player, then you'll have more use for the shield bank, but I'll leave that discussion for another day. If you do want it, then add your shield bank into power group 2 or 3 as you won't have the juice for it during combat.

This leaves me with a 5A Shield bank and three Class-B Shield Boosters. One used the extra MW I freed up from my hardpoints and two of the boosters are in the secondary power group so don't activate during combat, but thats OK.  I found that with the weapons overheating I had to take breaks and anecdotally stowing the hardpoints helps them cool down so I was putting my guns away even for a five second break between ships and getting the benefit from the extra protection too.

For the technically minded, (or those on a budget) the Class-5C shield generator with a Class-B shield booster gives you better protection than a Class-A shield on its own, for a smidgeon less power consumption and about a tenth the purchase price. (600K instead of 5M Credits) I had to do a lot of value-for-money comparisons building a sidewinder on a budget, and a lot of lessons like this transfer across to the larger ships.  Your real currency is the power consumption in the vulture, not the purchase price, but it's a point of interest nonetheless.

The last note on shields, is that I'm probably being over protective here.  The shields on my vulture hardly ever get taken down, and while that could be attributed to the extra shield booster, the nimble turning circle of the ship does a lot of work for you. Its just as viable to put less energy into the shields if you do want to run two high energy weapons however every now and then you get sandwiched between two anacondas and the extra shields really pay off.

Closing thoughts
Overall, my Vulture build came to about 23M Credits so the insurance is a little over a million and I had a few million in the bank for insurance so wasn't much worried about wrecking a few in combat trying out different loadouts. A Vulture on a Budget can be had from about 16.5M by fitting Class-B Thrusters and Shields, and the insurance there is going to be a little over 850K, but the ship isn't quite as strong.

It's a competent ship with plenty of options but I found the biggest problem was those overheating lasers. Beam and Cannon was the most fun, and didn't drain the banks as much as the dual laser combinations, so I'm going to keep those for a while.

I've not talked about colours yet ... I'm flying mine orange to match the Orion Arm Privateers who I'm flying with these days but I'm really coming round to the look of the blue vulture. Which scheme do you think looks best? Which paint style from another ship would you like to see on the vulture?

I hope these thoughts on the Vulture help you get the most from your ship.  Coming back to the vulture after flying small ships again has really given me a fresh perspective on it. What has been your favourite loadout - are you a beams or a burst pilot?

Friday 8 May 2015

Elite Dangerous Outfitters - Lakon Type 9 Transport.


Hey space cadets what is going on?
I'm Cmdr TwingTwang and welcome to the outfitters

In this article we'll be talking about the Lakon Type Nine Transport, while I've written a little about the smaller ships I realised I've neglected the big ole Fat-9 for outfitting.

As a first-time buyer, trading up to the Fat9 represents a huge investment in time and money compared to the T7 or Python a lot of people come from. Firstly you will have saved up the 76M purchase price, which its difficult to do by accident, and secondly you will be buying the ultimate space truck from Lakon and the only vessel - at time of writing - that breaks the five-hundred tonne capacity so its understandable you want to get the most out of the ship.

The shop floor Fat9 is a snap at 76M Credits, getting you a 220T ship with a 6.62 to 7.71 Light Year range but before you fly it off the forecourt with those specs we're going to take a while now and talk about the minimum practical configuration for a money-making Fat9.


Jump Range
If you are a dedicated space trucker, you'll have your favorite route that maximises your Cr/H profit in your smaller ship. The same route might not work so well with the reduced jump range of a Type-9 if it takes several additional jumps to get from end to end, which is going to take time and cut into your profits.
Before buying the big ole beast, you need to have a profitable route ready to go - it'll be super annoying if you bought the ship and then had to search for a route. Thankfully you can easily buy a disposable sidewinder for 32K at one end of your route and equip it for a similar jump range to the Fat9. Browse the galaxy map with this ship and see what the routes look like.  You are after the highest profit route with the fewest jumps, which might result in a different journey to your regular route.

The minimum configuration Fat9 is going to have a Class-E Frame Shift Drive.  Don't upgrade this unless it reduces the number of jumps in your route - for example I needed to make an 11.4LY jump, which meant the Class-E,D,C,B drives fell short and only the A could make it.  There was no reason to buy anything in the middle and I upgraded straight from the E to the A when I could afford it. Likewise, you should buy the smallest you need for your route - we'll talk about how to spend if you are flush with cash later.

Capacity
On the first day that you buy a Fat9, you should increase the internal capacity as high as you want to go but as long as its higher than your previous ship then you are set to make money faster so the purchase was worth it.

I'm going to talk about the three real options here:

  1. Defended Size-6 shields and 468T of cargo
  2. Reccomended Size-5 shields and 500T of cargo
  3. Baremetal with 532T of cargo

Defended Build
The defended build makes a lot of sense. The 6A shields give you about 29% more protection than the 5A option, and will keep you safer for longer while you make the jump to supercruise and escape from trouble.
The downside here is that the 6A shields cost sixteen million credits and they cost you 64T of cargo space - which equates to a net loss of about half a million credits per hour compared to the baremetal 532T option.
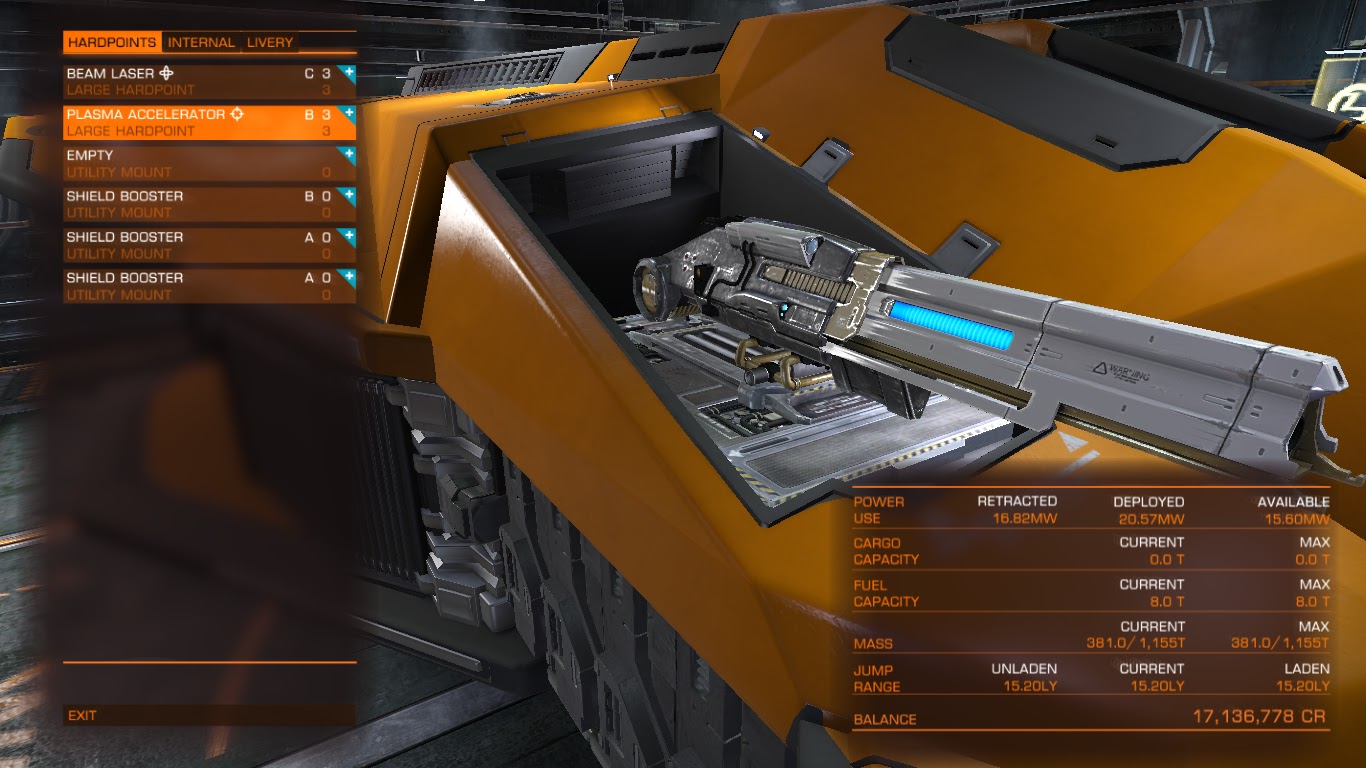
The Defended Build is ONLY worth it if you are spending the extra million on shield boosters.  Four Class-A shield boosters will cost under 1.2M Credits and make the world of difference - the 6A by itself has little value, as you could afford a 5A with boosters for a third the price and get better protection.

Recommend Build
The pilots choice award goes to the best size five shields you can afford. I actually did my first run with a 372T capacity using Size-5 shields as I didn't quite have enough money for the full cargo hold plus insurance so my Internal compartments looked like this:

8: 7E Cargo Rack (Capacity: 128)
7: 7E Cargo Rack (Capacity: 128)
6: 6E Cargo Rack (Capacity: 64)
5: 5E Shield Generator
4: 4E Cargo Rack (Capacity: 16)
3: 3E Cargo Rack (Capacity: 8)
2: 2E Cargo Rack (Capacity: 4)

As you can see, the 5E shields are a cheap starting point, and the 7E cargo rack in the Size-8 Compartment is at least enough to get you flying and makes more profit than than any of the smaller ships.
The 5A shield with a cheap 280K Shield booster will give about the same protection as a 6A shield, and only cost a fraction of the price.  Keep adding those Shield Boosters - you can afford them very quickly with a big earner like this.

Barmetal Build
If you don't have shields, you can fit a 532 tonnes of cargo into the Fat9. And I played like this for a while to benefit from the extra income it provides over the 500T build with shields.

I ran the numbers and while you can take a few bumps and scrapes docking and launching, the extra profits cover this so 532 Tonnes make more money than 500T even paying for small repairs. Its only earning an extra quarter of a million an hour than a shielded ship so you have to be really pinching the pennies and in a hurry for cash to run this ship.

In all honesty, and having done both, I'm going to recommend the 500T with shields build over the baremetal option. While the occasional docking scrape costs you less than the extra profit you make, you only have to get tagged once and you have a five-million credit insurance payout to cover.

Internal Components
Since the Class-A FSD costs fifteen million credits, it's worth doing everything else you can to decrease your tonnage and increase your range. So I'm going to recommend a Class-D refit across the board. This isn't super needed, but I do recommend it. It's possible that a smaller FSD will suit you, and I'll leave that you your trading and planning skills.

Its worth mentioning that the 5A power plant costs five million - ten times as much as the 6D but has more power, excellent heat efficiency, and weighs less. Its a good choice for a Fat9 freighter and has enough power for 5A shields and four Class-A shield boosters too.

A reasonable Type-9 Lakon starts leaves you with a 500T capacity is going to increase your purchase price to about 108 Million Credits providing a 12.8 - 18.1 Ly range. The full loadout starts to look like this:

M: 1F/F Pulse Laser
M: 1F/F Pulse Laser
U: 0A Shield Booster

BH: 1I Lightweight Alloy
RB: 5A Power Plant
TM: 7D Thrusters
FH: 6A Frame Shift Drive
EC: 5D Life Support
PC: 6D Power Distributor
SS: 4D Sensors
FS: 6C Fuel Tank (Capacity: 64)

8: 8E Cargo Rack (Capacity: 256)
7: 7E Cargo Rack (Capacity: 128)
6: 6E Cargo Rack (Capacity: 64)
5: 5A Shield Generator
4: 4E Cargo Rack (Capacity: 16)
3: 3E Cargo Rack (Capacity: 8)
2: 2E Cargo Rack (Capacity: 4)

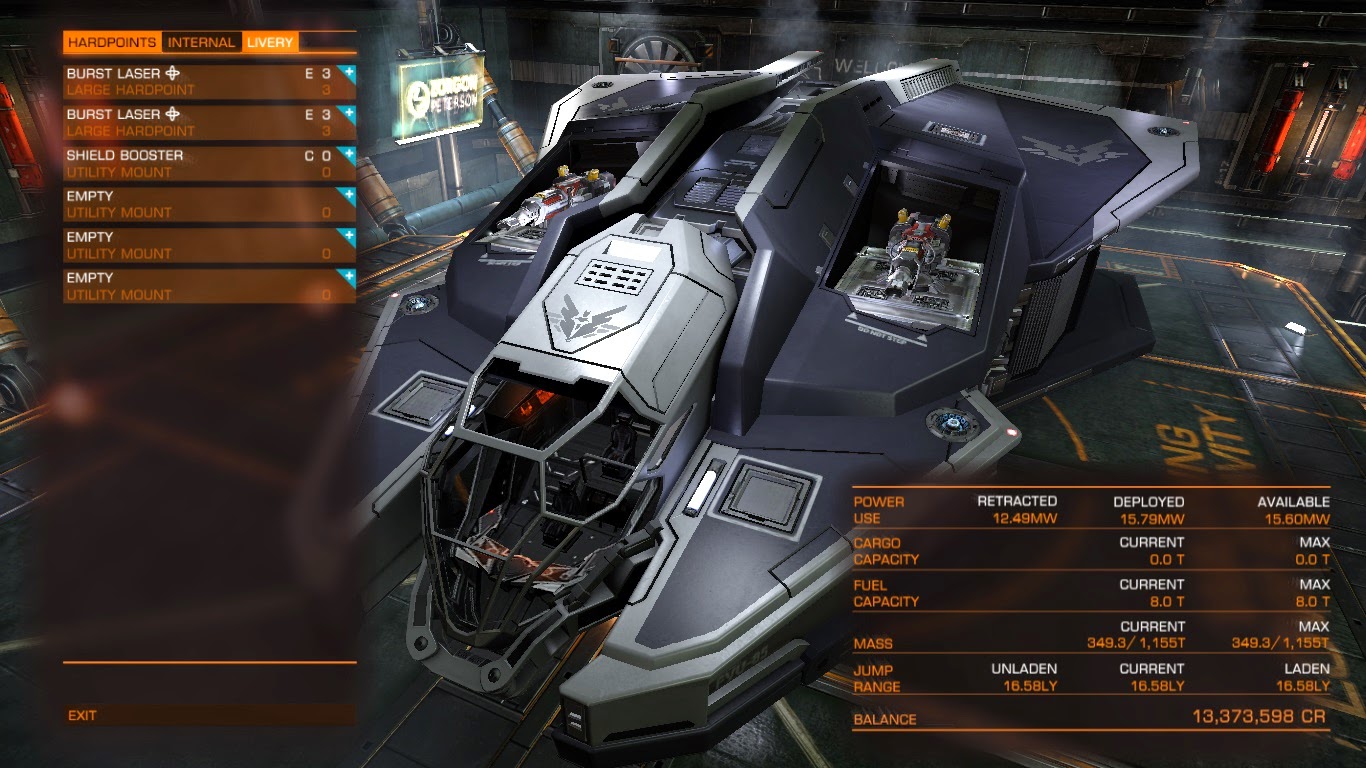
For the tweakers, you can drop the laser pointers, or replace them with a combination of chaff, mines, or turrets.  I've tried most combos, and generally once you are shielded and can jump to FSD your hardpoints aren't that significant.  Chaff and Mines are strongly recommended, although I have turret cannons on all five of my hardpoints just for the fun of being able to fire cannons.

This 108 Million build isn't the minimum profitable Fat9, but its a reasonably cheap build that maximises the ship well.  On top of the purchase you want about eleven million for twice the insurance and about the same again for cargo if you are shifting something costly like palladium so you need about a hundred and thirty million credits in assets before you take the plunge.

You can drop the shields, and FSD range to build a budget Fat9 and reduce your overheads to about 85M. You'll need the same twenty million on top of the to fly the ship, so the entry level for the ship is about 105M Cr. I really wouldn't recommend investing in a type nine with a penny less.

War Cow
For a few extra credits one could fit turrets in all the hardpoints and fill the ship with shields and shield banks. Its not graceful, nor does it pack a punch, but it's a fun and quirky way to rack up a couple of bounties - as long as you have a wingman or three to help you out before it gets too hot.

I have turret cannons on my Fat9 because I love the feeling of cannons. They never get fired except for fun, but a mix of fraggers and beams would add a little playful punch to this build and you could protect yourself against the riff raff, even in a combat zone.  Meanwhile you can always ram another ship and generally come out on top. Top-Tip... Fixed-Forward plasma helps soften up hulls as you approach them at ramming speed.

Closing thoughts
Lastly, it has to be said that the Lakon Spaceways Type Nine transport is a great earner. It'll net you 5M Cr/H trading local routes, and push 6 or 7 million if you have good nav locked jumps too. You won't get this from a smaller ship and this is one of the fastest ways to earn some spending cash. Other pilots will be happy to fly on your wing, as the trade bonds are a good enough incentive.

Outfitting the Fat9 isn't as tough as a space superiority starfighter, and you can pretty much have any configuration you want as long as you've got the cash available - and if you don't its a fast way to earn. For the most part its possible to buy a minimum configuration ship and trade up for the other bits you want.

That said it is an expensive ship to fly and you have to commit to a significant price tag, but the increased profits reduce the time you spend trading. This means you can spend time flying missions, and being a general space cowboy in your other ships.  For me this ship is a money-making enabler and a solid way to fund my gameplay, and I quickly hop back into the cockpit every week or two to grab an extra five or ten million to buy a shiny thing that has caught my eye.

Do you have any experiences flying the Fat9?  Are you about to trade up from a smaller ship and want some advice, or have a perspective from the other side as an anaconda pilot?
If you have any thoughts about the Fat9 then leave a comment, if there is an outfitters article or particular ship or build you'd like to hear about then let me know.

Keep on space trucking, and fly casual everybody.

Monday 4 May 2015

Elite Dangerous Outfitters - Combat Sidewinder

Hey space cadets, what is going on?
I'm Cmdr TwingTwang and welcome to the outfitters.

In this article we'll be looking at the ultimate underdog, the Sidewinder, and the upgrade choices I've made recently.  Since starting from scratch again I've flown the sidewinder for a lot longer than I did first time around, but its quite a system shock to be in the ship.

The shop floor sidewinder has class-E components across the board, dual pulse lasers and is a 4T vessel with a 6.96 - 7.56 Light year range.  While the ship was initially free, for fairness of comparison its got a purchase price of 32,000 Credits.

With only 1000 credits to my name I took this Class-E sidewinder out to a local conflict zone and shot up some bad guys to earn enough for upgrades.  I gave a review of the Class-E sidewinder in my first article and this will carry on from there.


Flight Feel
The sidewinder is the eternal underdog, and starting from Class-E doesn't help, but you have to fly it to its advantages - little as they are.  You have to get into point blank range to stay out of fire arcs, which is a dangerous place to be when it goes wrong but you can't outgun or outshield other ships to repeated lancing attacks are never going to go in your favour.
Corkscrewing around your enemy at point blank means vary carefully matching speed, tapping flight assist on and off when you need it and making boosts if you have to. You'll spend your whole time staring at a ships top surface or underbelly that will near fill your view but that's just peachy. Larger ships with turrets will tear you a new canopy, and I haven't found a way to deal with that yet but tight turns with fixed forward pulse lasers will do the damage against everything else.
Because of the way angular velocity works, if you are close enough you should be able to stay in the sweet spot for long periods of time. As you increase your distance you'll find they can turn quickly enough to level weapons at you, and your only response to getting shot at is to get closer.

Power Distributor
The first problem I has was my laser banks empting, so upgrades went into the power distributor to try and get more bank for the buck. Each grade above Class-E gets you about 10% more, with the Class-A getting you 40% more capacity and a 50% higher recharge rate to weapons and costing 20,000 credits.  The extra power to engines and shields is a well received bonus here - The class-E shields aren't enough to keep you safe if you get tagged, and its impossible to boost to safety with the shop-floor ship.

Shields
Even with a Class-A power distributor, and flying like I was in a vulture, I found that I still got hit in combat zones. Sometimes you'll approach a ship that you didn't expect to have turrets, or take hits from a second ship on your six. In these cases, you've lost your proactive stance and have to read the situation and react.
The Class-E shields are rated at 52MJ, and you get an extra +4 out of each class upgrade. Its not that significant but every little helps.  The Class-D is a snap at 6000Cr, and even the Class-C is affordable at just under 18000Cr.  The step up to the Class-B shields is a massive 53KCr... So here comes the science bit...
The Class-C shields with a OD Shield booster in your utility slot will cost 40K, and get you a 64.8MJ shield strength compared to the 53K you have to pay for the same protection from the Class-B shields on its own. The same goes for adding a second Class-D shield booster - cheaper and better protection that those big old Class-B shields.
However, You'll need to upgrade your Power Plant to Class-D for an extra Six Thousand Credits to be able to run the C-Shield and D-Booster combo. But its still cheaper and well worth it.

Mathmatical Madness?
I know it looks like I was overthinking the Sidewinder outfit, but I had plenty of time to think. Every few kills I scored, I'd get scratched up and it only takes getting destroyed and loosing your earnings a couple of times before you realise you need to dock, repair, and spend your pittance finding the most cost effective next upgrade.
My Power Distributor and shield setup is a 90K ship, and I viewed each purchase as the most important next thing to buy. Your experience may vary, but this is what mattered to me.

Obviously I'd love to spend the money on top-spec shields, but that spend comes in at about a million credits - ten times as much as my current bank balance, although I suspect even a top spec sidewinder is going to be a difficult ship to keep safe.

For the record, a Class-A sindewinder isn't going to cost much more than a million credits as the shields and power systems are going to be your biggest purchase. I know 1M sounds like pocket change to experienced pilots, but when you start out it's a daunting milestone.

Internal Systems
I found myself buying other ship systems one at a time as I could afford them, and not worrying too much about the exact build. The importance of the Power, Shields and Weapons took priority over everything else, and had I really focused on shields it would have cost every credit I earned.

Weapons
The dual laser pointer setup of the stock sidewinder quickly gets tiring, but the other options aren't super inspiring either.
The gimbal pulse lasers have the same power consumption as the fixed-forward, and although my fire arc wasn't a problem they do make it easier to target subsystems and take a little pressure off of the turn.
The fixed forward beams cost about 37K each - half as much as the gimbal beams and after getting used to pulse lasers for so long the extra damage output is really appreciated and you've just about got the energy to run them.
My biggest problem with the pair of small hardpoints was the lack in killing blow. The dual beams will take down shields - maybe slower than you are used to but they manage it. The problem is they take several sustained bursts to slice through all but the smallest hulls and I found a number of enemy ships fleeing the battle and making the frame shift jump.
Fitting one beam and one cannon or frag cannon is a problem in the sidey, as the projectile weapons require different target leading to the laser. Even at point blank range this can still make a difference, and for this reason I'm going to recommend one gimbal and one fixed if you don't want them both on gimbals.  I found that a fixed beam and gimbal cannon felt pretty good.
The beams cost 37K for fixed and 74K Gimbal.
Cannons come in at 21K for fixed and 42K for the gimbals
The 1E Fraggers are 36K and 54K for the Gimbals.

I didn't try multicannons, and while I know they are favourites of some pilots I've never really got on with them. The choice here starts to become a personal one, although I usually recommend frag cannons for escort fighters and cannons for conflict zones.
The cheapest option, 37K fixed beam and 42K Gimbal cannon, works surprisingly well and I liked that a lot - and not just because of my limited funds. I found most ships that fire chaff do so fairly early, so the gimbal beams lost track early and slowed down the initial fight. This pilots choice award goes to the beam+frag combo rather than the straight cannon because I liked the additional damage per second and didn't mind the trips back to the station to re-arm as I could claim some bounties.
The downside of the extra time taken to break down shields can be a problem

With its fragile hull the combat sidewinder is a dangerous way to earn a living, but you can still pick up bounties as long as you don't overcommit. Conflict zones are a lot more dangerous than single bounties because you aren't equipped to deal with more than one ship at once and the sidewinder gets outnumbered quickly. Unlike the larger fighters, life in a sidewinder can switch instantly from full shields to punching your ejector seat so I'd recommend cashing in bounties frequently and repairing even small scratches in your hull - overconfidence doesn't just cost you your insurance payout, but you lose bounties which is the larger tragedy.

Conclusions
The sidewinder is a much more competent ship that I'd previously given it credit for and while it's no match for a vulture you can still deal the damage if you can stay out of trouble.  The insurance cost is very low although repairs, insurance and ammunition do add up when you are on the poverty line.

I've more than answered the question "why does anybody fly a sidewinder?" although I'm very unlikely to switch back to one once I have the couple of million needed to buy and outfit a Viper. I'm not sure if I'm going to stay in my trusty sidey until then or switch up to the Eagle and repeat the process.  I suspect the Eagle is going to earn money faster than the sidey, and with a bounty hunting community goal this week every it'll pay to take every advantage I can get.

Any other thoughts from dedicated sidewinder pilots? Have you every gone back to the Sidey for a bit if wing-and-a-prayer space-flight?  Which loadout did you settle on?  If you have any outfitters articles you'd like to see, thoughts feedback or comments then let me know.

Don't forget to like, share, favourite, follow and subscribe. I'll be back soon with a review of that Eagle. Until then, fly casual.

Friday 1 May 2015

Elite Dangerous Second Account - from riches to rags.

Hey space cadets what is going on?
I'm Cmdr TwingTwang and welcome to the space bar. 

In the first part I tried to give an honest appraisal of the sidewinder and the first leg of my journey from the ground up. In this article I'm going to spare the details on combat or trading and talk a little more about the philosophy and mentality of the second account.

A good fraction of my playing time has been social in ad-hoc groups or combat and trade wings and I've never wanted to give that up so didn't go exploring. Because I fly with the fleet at least once a week, there wasn't any easy way to go exploring however I want to get my explorer rank up and decided now was the time.

Why Exploring? I don't really know. The plan was always to get a trade ship and use that to fund exploration and combat endeavours, and sticking to this plan gave me a playing experience sponsored by Lakon Spaceways, sprinkled with some combat experience in various ships along the way. Right now its time for something different and sending my main ship exploring will leave my secondary account fighting in conflict zones.

Purchase Price
Its probably quite possible to fit some short range exploration in and still be back each week in time for some social gameplay, but really the only option is two accounts.  The extra purchase costs £39.99, which isn't cheap but isn't outside the realms of affordable either. The financial cost is a once-off payment and being reasonable the cost of the game is worth less than the cost of my playing time if I'm going to play seriously.
If you are thinking of buying a second account, then consider how much time you are going to spend in it and if it counts as value for money. However you roll the dice, forty quid is a lot of money for a sidewinder though.

Starting from scratch
Having a second account isn't the same as having a second pilot on your main account. There is no safety net, no shared credit balance and no easy option to transfer money between ships. Its not like having a roster of ships to fly, and earning money in one account provides no transferable benefit to the other.
This is why I'm going exploring on my main account - I'll receive the accolades, rank, credits and the reputation for the effort. The secondary account will get nothing, and in fact anything it does earn will be throwaway, valueless to me overall.

Friends and groups
My friends list is cleared and I'm not in any private groups, which feels oddly harsh and makes space a lonely place for a sidewinder.  I've added a couple of Alliance pilots that know me, and was able to get some trade bonds as well as serve as a Nav Lock beacon. (yey) but I don't want to make new friends, and don't want to divide my friends between accounts either.
This was a big reason to go exploring with the second account, and keep flying space planes with my friends.

Shake it up
If I just wanted a change of pace in my gameplay, I could go exploring in my main account. I can afford a few weeks in the void and to be honest its no big deal.  If you are thinking about exploring because its something different, or you want to be the first to discover something, then save up the money you need and just go for a jaunt across the galaxy.
I wouldn't recommend buying a second account just so you can do two things at once. Overall I'm aware that its a luxury item that really isn't needed for the enjoyment of the game, and its just as good to stay with one account  - better if the ranks and earnings matter to you - and do these things as the mood takes you.

Sock Puppet
There is a short crossover between my new account arriving and my main one leaving, and I shamelessly logged in to both at once so that my sidewinder could earn trade bonds from my type nine as it saved up for the Asp explorer.
This felt pretty lame, but its a tax on the game for not providing me a better way to do this. I want to transfer twenty million to my second account so I can get setup with a Vulture and keep on fighting while I'm off exploring and there are no options here. (ab)using the second account like this isn't a great reason to buy one but the maths are interesting to consider. The nav-locked jumps speed up my trading by about a million credits per hour, or twenty percent of your takings if you are in a smaller ship, plus I get around 150K/Hour deposited in the secondary account by way of trade bonds. Again expect lower figure if your main trade ship is smaller.
Forty pounds gets me an extra million per hour - its almost like a bribe, I mean, backer benefit all over again.

Colour Coded
As well as missing my in-game purchases, the second account doesn't have access to the out-of-game purchases I've made - paint jobs. So I've gone from a majestic stella peacock to flying stock ships like a space scrub.
This doesn't matter much, but it is a difference that's allowed me to reevaluate how important the look of my ship is.  I suspect my second account won't get any perks or extras for a long time - if ever. It feels like they are being thrown away as "I can't take them with me" and when I switch back to my main account it'll all be forgotten.

Captains Blog
I also wanted to go exploring and write a bit about it, but didn't want to sacrifice the ability to discuss ships and outfits. These are mutually exclusive tasks, and unresolvable without a second account.  A hiatus or worse, a rather dull "This one time, at the nebula..." monologue would be about as interesting to write as it would to read and starting from a sidewinder in the second account has given me plenty to write home about.

Conclusions
Overall, starting a second account was clean and painless. I think I had to use two different email addresses to sign up with, but that no real problem in this day and age. I used a gaming aliases I've had in the past so it should be easy to remember.

The £40 luxury spend on a second account just so I can explore the galaxy is an expensive spend that I wouldn't recommend overall. For me, the purchase price is smaller than the cost of my time and I don't overly object to paying it but for most gamers this extra exploration tax is going to be too high to represent value for money - You don't get anything you didn't already have, but pay for the privilege.

Despite pointing out all the negatives, starting a second account isn't the wrong move for me and I've got less buyers remorse now than I did when I bought my Type-7 Transport.  Its going to enhance my gaming experience, I've enjoyed the first baby steps in the Sidewinder, and I'm going to enjoy being able to explore as well as fly locally over these next six weeks.


Tuesday 28 April 2015

Elite Dangerous Space Bar - starting a second account.


Hey Space Cadets, what is going on?
I'm Cmdr TwingTwang and welcome to the space bar. In today's article I'll be reflecting on the undersung sidewinder. This is a story all about how my life got flipped - turned upside down. And I'd like to take a minute, sit right there, to tell you how I got my second space plane in the air.

I'll make no excuse, I didn't fly the infamous sidey for very long.  I traded up and got into a little ZP, where I could load sixteen tonnes and start turning a profit. I ran freight for a while and that set me on a long path as a Lakon owner. I used the wealth to buy a number of vipers, and I love taking my vulture out for a spin in a conflict zone but I've never been a "combat pilot".

The decision to start a second account has been a slow one, and on my mind for a while. I was disappointed that I couldn't start a second pilot on a normal account and the entitlement to play it my way was pretty strong. I haven't gone exploring yet because I play regular games with my crew and don't want to be gone for weeks unable to play socially.
At first, not having a second account was a relief - the huge time I put into grinding profits for just one ship was enough and the thought of doing that again wasn't attractive. But after a discussion with other pilots, I was ready to go.

So I started a new account so I've still got a way to fly with the fleet my main ship is off exploring the galaxy. And found myself at LHS 3447 in a stock sidewinder with a thousand credits to my new name.

Economy of Scale
The stock sidewinder mentality is very different to a high-tonnage hauler, and I went from rounding credits to the nearest million to counting hundreds, tens, and units. Every decision I make in this journey is going to affect my profit bottom line. A repair bill is now a big deal, however with no capacity to carry cargo and no currency to buy it there could be quicker profits to be had as a bounty hunter.
I've written posts about using a cheap sidewinder or ZP to start earning serious money running rare cargo across the galaxy, so I just need to spec that ship and claim some bounties.
The entry level rare runner ship needs a good range and a little cargo space.  I talked about entry level ships in my original Rare Runs article - and I'll be picking one of these and trying to follow my own advice on a simple straight route. I priced up the cheapest one around a little over 100K, which is my initial earnings target so I can get on my way.

Classy Class-E
After everything I've done, the starting sidewinder is long forgotten and its Class-E stylings and duracell laser pointers are barely even a memory now, and getting into it feels dis-empowering. But I screwed my balls on tight and plotted a course for the neighbouring conflict zone.

I've got to say the stock sidewinder doesn't fly very well, but I learnt a lot from its shortcomings and I'm armed with a little experience at outfitting ships.  The Class-E sidewinder is not not quick enough on the turn to stay safe and not fast enough on the boost to get out of trouble. You put all your chips in on every hand with this ship. When you commit to a fight you have to know - not fear - that it's going to be a fight to the death.

Play to your strengths
The sidewinder has to play to its strengths, few and far between as they may be.  In a rough and tumble fight there is only room for the quick and the dead, so you have to get in close to make your mark without getting tagged, and then spiral out to mid range to angle in for a new attack run. The sidewinder is a constant juggle of throttle and turn to stay out of fire arcs, and it keeps you on your toes. While this the same mechanical motions of flying a vulture, doing it as the underdog has a different feel entirely and even the slightest mistakes can really put you out of position.

Laser pointers
The next thing you notice in a Class-E ship is that the laser banks deplete straight away. Now my accuracy wasn't actually that bad. I didn't land every shot on target but did better than I expected with its pair of fixed forward E1 Pulse lasers, and the banks draining were a testament to me keeping my crosshair filled for decent durations.
But humble bragging aside, the laser banks will drain to nothing - hit or miss - and require a four-pip top up.  The most difficult moment in a sidey is when your enemies shields come back online - it feels like so much hard work down the drain and signifies another roll of the dice.  This I found a real problem with fixed-forward - The gimbals I've grown used to make it easier to finish off wounded ships, or to target modules like the shield generator or power plant.

Eggshell Shields
The tiny Class-E shields and tinfoil hull of the sidewinder don't do you any favours and both will be reduced to nothing after even a shot burst from a larger ship. A larger power coupling is a must to keep the shields and lasers topped up and once but even then not getting hit is your best strategy.

As long as you hug close to the ship shooting at you, you've got a good chance of being able to keep out of its fire arcs and keep those shields topped up. As soon as your shields get tickled, you've got to give them more pips before they flash and the constant energy management typifies the wing and a prayer combat feel of the sidewinder.


After a couple of trips to the conflict zone, I've upgraded my Power Distributor which felt like the most wanted component, and I've upped the shields too. I never had enough power for my shields, the weapons ran dry and I couldn't boost frequently.

The power distributor and shields are likely to take more upgrades too, followed by thrusters and weapons. I'd like gimbals and boosters for the shields too. One more trip out will fund a rare run, so my time in the sidewinder has all but come to an end.  Its been an educating time and I can claim with some confidence that I've played the underdog card. Not having the safety net of a hundred million credits has made this more real that I'd expected

I didn't have sidewinder nostalgia before today, and while I'll be very happy to get into a ship with a bit more punch, I won't take my vulture for granted having flown toe-to-toe against ships several times my size.

Until next time, fly casual.

Thursday 16 April 2015

Elite Dangerous Space Bar - Cobra Cosmetics

Hey space cadets, What is going on?
I'm Cmdr TwingTwang and welcome to the Space Bar

In this simple roundup we'll be looking at the Cobra Colours. I'm not going to detail different Cobra outfits - The final ship I flew was this Classic Cobra Outfit that we used on a recent Tourist Trip to Sol in advance of the upcoming Earth Day on April 22nd, 2015.

Serpent
The serpent cobra is a professional looking two-tone design that really plays of the strength of the cobras iconic form factor. The strong diagonal lines mirror the wing shapes and compliment the design of the ship, and the dark trim and vents work really with the colours.


Available in a black body with bright red panelling or a two-tone yellow with dark panels the serpent cobra looks sleek and stylish. The coloured panelling displays subtle shifts in colour that help pick out the detail of the ship in close up inside the broad geometric shapes.  Its a tragedy that there aren't more serpent options, nor a serpent scheme available for other vessels as this would make a great fleet colour.

Both the broad base colour and flat panelling accept the pale decals very well, and present your rank with pride and purpose.

The red and yellow options both look good in a variety of lighting, although I found the yellow more versatile overall. With the only complaint I could level at the Serpent being that I wanted more, this is a paint scheme to look out for in the galaxy.

Rattler
The rattler features a bold central racing stripe and is available in blue or orange.  While the Blue variant looks better in promo shots and in the store and its tones look just grand in the outfitters bay, the striking orange and white has more definition in game and looks cleaner under a larger variety of lighting conditions.


The cool racing stripes on the rattler look great, the clean flat areas accept decals well.  The blue rattler comes out better in this regard with the white decals accented with sky blue cutting a strong contrast to the blue body and black stripe.  The Orange rattler sports yellow decals that somehow lose clarity on both the orange body and white stripe.

Overall I think the orange rattler looks great in space, its got an industrial feel and looks great contrasting against bright suns of dark planets alike.

Camo
The Urban and Polar Camo patterns available for the cobra differ in style to the choice of Urban, Polar and Jungle camo paints for the Eagle and Sidewinder but can still be considered a single theme. I'm going to go ahead and say its a different artist on the Cobra, or at least a different brief, when this was put together.


Noteworthy here is that the cobra camo patterns are bespoke - the Urban and Polar patterns are different compared to the lowly Sidewinder where the same camo pattern has been cheaply recoloured to produce three products.  This additional attention to detail, along with the different palette of colours used sets the cobra camo aside.

The polar camo cobra includes black trim around all of the wing tips, vents and utility mounts and shows good attention to detail. While the promo shots provide a splash of colour, the gloss camo pattern doesn't really break up the outline of the ship and it becomes apparent that there is no practical purpose to the camo pattern - its there because camo is cool.

Decals appear a little out of place on the camo, although as observed its a decorative rather than practical camouflage pattern and the presence of the decals isn't too jarring. The decal colours don't stand out very strongly, although the white decals on the polar camo look a lot better than the pale metallic feel of the decals on the urban variant.

Onionhead
The short-lived onionhead is fresh punky design and the first paint pack to include custom decals, however its asymmetric design does little for the eye, doesn't respect the shape and contour of the classic cobra.  While its random paint-can style is initially eye-catching, its perfectly clean factory finish is a reminder that this "alternative" style is going to leave you identical to all of the other pilots who want to look different.


I don't like the colour, I don't like the way the base black is lost against the darkness of space and I don't like the poor decal placement.  For a pack that provides additional decals, I really wanted something that "goes together", but the provided decals don't have space to sit and be admired on the visually busy wings. Firstly one wing already contains a decal pattern, and neither wings have space to accept the lime colour decal with any clarity.

Pirate
The pirate skin is another departure from symmetry, and while both the Camo and Ignition packs were asymmetrical and spanned several different ships, the Pirate scheme rightly claims the crown as the first faction paint.

The matte black and gloss red colours look good by themselves and the white skull motif, although a little squashed, complete the look and feel and compliments the colours.

The cobra stands out in being the only pirate ship with the Skull painted on the right side, making it a mirror image of its six counterparts.  This oversight jars me more than it should, and a simple mirror image of it would really help.  However, I have no intention of ever flying pirate colours so while that counts against the image, it's not going to make me less likely to fly it.

Lastly the decals are a disappointment on the vessel. Their placement isn't really respected by the black, red, or white areas of the ship and the blue colour is lost among the other patterns. Lack of pirate specific decals bring home that we are also missing Federal, Imperial and Alliance decals too but hopefully faction paints and decal sets for these are not far behind.

Ignition
Like the Camo before it, the Ignition series spans both several ships and colour variants. This made it possible to fly a wing of different Ignition ships, so long as Sidewinders and Eagles are your style. The striking ignition patterns with its matte black to gloss red sunburst is also available in an all-gloss maroon and orange base, both with metallic flames.


The gunmatal trim finishes the scheme, and while its far from subtle the Ignition cobra looks good both docked or in flight.

The general badassary of the ignition patterns put it as a contender for my top pick. Both the orange and red base look good, both have great front gold decals although the wing decal spots are a a little visually busy with the flame. Its a minor complaint, but a little more clearance for the wing decals would have been appreciated.

Vibrant
Lastly, the vibrant cobras are available in six shades - Red, Orange, Yellow, Green, Blue and Purple. Out of all of the other patterns, these look the worst in the store. In fact, the store and promo images look fairly poor. However, once on a ship they look surprisingly good and play to the strengths of the retro solid geometric roots of the game.


The trim and decals all work well with the vibrant paint packages and are tinted to match the overall colour.  There is subtly and variation in the design in different lighting conditions that doesn't show through on the storefront pictures. Unlike many of the other options the vibrant packs allow you to match your fleet together from the smallest sidewinder to largest lakon and everything in between.

Being able to match colours with other ships is a really strong selling point on the vibrant pack, and hopefully it paves the way for more cross-ship paint schemes that will really help to bring the galaxy to life.

And finally...
The cobra paints give the ship new life and form a link to the past and eye to the future of Elite. The Cobra is a versatile ship that is fun to outfit and fly, and with a choice of colours you can make it feel a little more your own. The development team were obviously listening when we asked for a set of paint schemes that looks the same across multiple ships, and here's hoping that the vibrant range gets complimented with Serpents, Ignition, Camo or other great faction designs so that we can fly in style.

I'm Cmdr TwingTwang, and this has been the space bar. What is your favourite ship and colour combination? Do you love the versatility of the Vibrant paint or hate its simplicity? If you got a ship, loadout or paint you'd like to see then drop me a line.
Please, like, favorite, +1, share and subscribe.  Until next time, fly casual.


Wednesday 15 April 2015

Elite Dangerous Space Tourism - Sol

Hey space cadets, what is going on?
I'm Cmdr TwingTwang and welcome to the Sol tourist board!

I'm afraid I don't have any hard stories for you this week - its just some shots from a jaunt across the galaxy by some Alliance Pilots.  In this iconic journey we took the Classic Cobra detailed here and headed out for the second star to the right, linking together Elite, Frontier and Elite Dangerous in an old-meets-new retro revival.


This week we took a wing to Sol to see the sights.  The trip from Lave to Sol isn't that far and even a reasonable vessel can make it in a few jumps with a single stop to scoop fuel.

The box formation is a little difficult to hold steady, although we got by with only a couple of bumps and scrapes along the way.  Formation flying is useful and practical in a combat zone, but tight boxes like this are insane under the heat of fire.  We were kissing inches from each other to get everybody in shot, although looking at the picture we had loads of clearance.


Three of us in a wedge formation, gazing at a tiny blue marble we once called home. Holding the wedge formation is easier than the box, even with the Cobra restricted cockpit view.  Like a predator, the ships view is biased toward looking forward, but as long as the two wingmen are in the right position behind the leader then it all works well.

After earth, we took a trip to Mars High to sell the cargo holds full of rares we all carried - this was our way of paying for the trip - and then headed out to Jupiter.  The wing beacons and nav-lock system worked a treat for keeping us coordinated and while it could always do with some improvements, the few times we got interdicted we were able to drop in as a wing and sort out any trouble.


Jupiter looks weird no matter how you look at it.


Just how close can two Cobras get without touching? The answer, is VERY close indeed. We needn't have been so worried about the formation shots - there is loads of clearance between to Cobras.

Overall we learnt a lot, got a team route in over 100Ly jumping together, had a few interdictions, payed off my federal fines, took some good shots but had a huge amount of fun on our first Space Tourism trip around Sol.

The next trip will be more coordinated, and we'll probably take a couple of wings out for maneuvers to flex the Alliance Fleet a little and get some great formation flight practice in.

I'm Cmdr TwingTwang, Fly Casual everybody!


Saturday 11 April 2015

Elite Dangerous Rules of acquisition - Trade Wings


Hey space cadets, what is going on?
I'm CMDR TwingTwang and welcome to the Rules of Acquisition!


In this article we'll be talking about Trade Wings, and trying to break them down.  Formation flying has always been slower than jumping alone, and while the wings update really helped streamline the process there will always be a fleet management overhead.

The Wings update allows you to fly (up to four) ships together in a wing, and provide trade bonds as an incentive to trade together. When somebody in your wing makes a profitable sale, you get a trade bond worth 5% or that profit - the bonds can be cashed in for credits at the station.

However the reality of trade bonds is that they aren't the free money you'd think... 

I've flown a couple of trade wings to try and get an impression, and one thing that strikes me is coordination is key. For example, with my regular fleet, The XO is pretty slick at calling launch, charge, jump, etc... so we can trade with minimum delay.


However I  managed to fly in a pug wing with some other Type-9 Pilots. With three Fat-9 ships you'll be earning a free income of 5% from 1000T. While your exact results may vary, I'm going to run the numbers on 2000Cr/T at four trips an hour and say that each pilot is going to earn an extra 400,000 credits per hour just for being part of the wing. 
With a fourth T9 that would be about 600KCr/H, or on the other hand if that fourth ship were a fighter escort it'd earn 400K/Hour as a salary on top of any bounties it collected from blasting bad guys. Not a bad incentive.

I didn't stopwatch the run, which I will do next time. Its 10% extra income (up to 15% with four ships) but its slower to manage, especially with multiple jumps, and I'm not sure if it took more or less than 10% extra time to complete.  While my back-of-envelope calculations assume fifteen minutes for a long trip and twelve minutes for a short, fast run, leading to either exactly four or five trips an hour the reality is that a Type-9 Transport is going to be making well over a thousand credits per second and asking me to slow down - even by a little - is going to cost real amounts of money.

Like a Sixer or T7, the Fat-9 is going to benefit from the highest tonnage you have the courage for and running four 532T ships on the same route also risks rocking the market, driving the prices away from profitability and eating into your own profits as a victim of your own success.  To counter this, you'd have to have several routes and commodities planned, and either rotate evenly between them or run one until the margins drop and then switch.  Route planning is all the responsibility of the XO, but the entire wing have an interest in the best route.

So the crux of the matter for me is that trade bonds aren't a free money cash bonus,I don't know how many minutes per hour were lost to the wing, but between zero and six minutes the trade bond is a salary for coordinating a wing.  Above six minutes its a compensation for lost earnings.

Flying a wing is a lot of fun, you get great banter and a pug wing is a way to meet new pilots. Anything greater than five percent would probably be crazy, but wings probably benefit fighters more than they benefit traders at the moment.

I'm CMDR TwingTwang, if you've had some experience in a trade wing or want to get started playing with others, leave a comment, let me know and share your success, advice or thoughts. Please Like, +1, share, and let me know what you think of Wings.

Fly in a Casual wing.

Friday 10 April 2015

Elite Dangerous Space Bar - Lakon Lessons.


Hey Space Cadets, what is going on?
I'm Cmdr TwingTwang and welcome to the Space Bar.

In this article we'll be looking at the freighter offerings from Lakon Spaceways. This isn't a complete outfitters so I won't be promoting a particular build, but I do want to highlight some of the strengths of different loadouts.  Since the Asp is a versatile ship in its own right, I'm going to save that for another day and it deserves its own article so here I'm going to focus on The Big Three.

Type-6
The entry level freighter from Lakon Spaceways is the Sixer. Its a great, reliable transport and the most versatile of the three offerings.
A hundred tonnes makes it the largest small ship, almost twice the capacity of the Cobra whose 60T maximum gives sits in second place and the 1.2 - 1.4M Cr range is an incredibly cheap investment for the Million-Credits-Per-Hour freighting profits it will give you.

Stripped to bare metal and given a Class-A FSD the Sixer costs just under three Million credits and gets you a 112T internal capacity with a 19.1 - 30.3 Ly jump range.

Principally a mid-range freighter, being able to jump 30Ly when empty makes it an interesting choice for a long range galaxy hopper, and a contender for a cheap explorer.  Getting the same range out of an Asp will cost between twelve and fifteen million credits, so this really is an easy way for a new pilot to start exploring. You'll need all of the usual explorer gear, auto-repair etc.. to do this in a Sixer, and its not the most glamorous way to see the galaxy but it'll get new pilots into the void for a rock bottom price.

At 112T unshielded the Sixer is the smallest and fastest freighter able to boost at 350 clicks, making it the fifth fastest ship in the game with the Cobra, Viper, Clipper and Orca all managing to outrun it. This means its one of the few freighters that can steer clear of trouble, and its 3A Power supply can keep 3A shield generator with three Class-A Shield Boosters running which should protect your hide before you make a jump to safety, or you can add chaff in there too.
The value of speed is not to be misunderestimated, as its two small hardpoints are not going to see off any trouble. If you are trading in a Wing and are expecting to fight together, then Beam Lasers might help and anything with a Gimbals will increase your dps. I'm a fan of seeker missiles on freighters - you are unlikely to tip the balance with little laser pointers, but if the enemy ships shields drop you can unleash those hurting bombs and gain the upper hand.

I really enjoyed flying the Sixer as a freighter, which is a funny thing to say because you spend a lot of time in supercruise flying in a straight line. But the fun of it was optimising the route - The ship is a little slow on the turn its not that bad and has got a lot of pep. Coming in hot and launching fast was a lot of fun and I did a lot of stopwatch runs trying to shave every second off my trip time and maximise my profit margins. I learnt a lot about instrumenting profitability during my long stint in a Sixer and one of the big Lakon Lessons here is to fly fast and enjoy the little things.

Its long range, high speed and low price make it a rare running option too. You can hop across the galaxy in a rares loop, wheeling and dealing with the best of them and you should be able to make as much or more on rares than you do with commodities.

The price difference between the Type-6 and the aspirational Asp is in the ten million range and at one million an hour you are likely to spend a long time in the Lakons spacious cockpit if you want to trade up to a better ship. Get used to it.

Type-7
Lakon Spaceways entry into large-capacity trading is the Type-Seven transport.  The price break between the six and seven is huge and its twenty million price tag seems overwhelming at first.

The first Lakon Lesson from the T7 is that nobody buys one because they want to fly it. Its a huge investment that often results in pilots selling their smaller ships to afford it, and buyers remorse is more common that you think.  Bottom line, the middle-child of Lakon Spaceways is something you buy because you are saving for a Python, or one of the big Imperial or Federal ships.
Maybe you are doing it to fund a smaller ship, maybe you are a dedicated trader wanting to pilot a Type-9, but its very rare that the Type-7 is the end-goal for even a space truckers ambition.

The most important lesson I learnt from the T7 was to save money for insurance. When I first hit twenty million I sunk it into this ship and headed for the stars.  My first trip out was fine, and paid for a couple of ship upgrades that meant the second trip was under the insurance bracket - but its such a big earner I didn't mind.  Sadly, I lost the lot and had to start the game from a Sidewinder again.

So really the Type seven taught me patience. I had to play from nothing back up to everything, and every moment aware at the credits that I'd lost.  After crashing a Type Seven, I learnt patience and just a little humility.

But the T7 picks up where the Sixer left off and a bare metal refit provides you with a 232T vessel that'll make an impressive 17.4 - 25.8 Ly and cost you a slice over 23M Cr.

Allocating 1.2M for insurance (twice) and 9K/T cargo costs you'll need to have a clean 28M Cr to your name before you buy a T7. You can just about get by on 26M if you run a smaller cargo hold and only hold one insurance claim in cash - but if you claim it you are left flying without insurance which can end badly.

Four small hardpoints and size-5 shields can give the T7 some protection as part of a convoy, and I'd like to draw your attention to quad-linked dumbfire missiles.  I've you've ever been tickled by dumbfires you'll know what it feels like and can turn the tide in a fight if you can get a good line of fire. Otherwise, quad-beams aren't so bad, and gimbals are a snap at 75K each. Turrets will cost you half a million each, and two million feels expensive given your plan is to never fire them, but if I was re-equipping a T7 now, I'd be considering the big guns.

The T7 doesn't have the speed of the Sixer and you can't outrun trouble. It's going to hit about 300 clicks on the boost and there are LOTS of ships that will carve their name in your thrusters as you try to escape.  Adding chaff and mines will help your cause, and your best bet is to submit to the interdiction and jump system.

Type-9
The first rule of acquisition is maximise your profit-per-hour and the big Fat-9 from Lakon is the king of the spaceways when it comes to shifting cargo.

Unlike the T7, the big Fat-9 feels less like a temporary ship and more like a way of life. Its a flying space-slug, for sure. It only flies in a straight line and doesn't do that very quickly.  In fact, there is little to like about the Fat-9.

From the Type-9 I learned that I can push my way in - or out - of the mail slot at a station and everybody else just has to get out of my way.  When it comes to momentum, size does matter and you can dock when you want to dock... just slowly.  Apologies to the Cmdrs that I scraped, and my heart goes out to the NPC sidewinder that was trying to launch and I just pushed back into the station.  the Type-9 is an elephant in many senses of the word.

A true workhorse of the shipping lanes, Lakon have provided us with a huge vessel that maxes out at 532T and will give you 12 - 16.9 Ly at this capacity for just over 96 Million Credits.  Add an extra 10M for twice the insurance and 5M for cargo costs and you are looking at a minimum spend of 110M before you are flying.

You can buy a 532T Fat-9 with a 9.8Ly range for just a smidgeon under 100M credits, by skimping on the frame shift drive, and reduce that to 95T if you only hold enough for one insurance payout.

The total spend on the ship comes to 250M Cr. if you decide to Class-A everything, and a ship this size has no shortage of upgrade options. I'm only scratching the surface, but find myself buying the odd piece here and there.

Which brings us to the Last Lakon Lesson Learned. While true for the smaller two ships, the type-nine has really taught me that there is no shortage of upgrades to buy, and you can spend a long time at the outfitters clocking up an expensive loadout bill.  In all things moderation - for the Fat-9 like the T7 and Sixer before it I'd recommend starting off by only buying upgrades that increase your income, and leaving the rest in the bank.

I haven't flown my T9 with less than twice the insurance cost yet, and don't intend to. Its a ship I'll put a few hours in here and there to fund my other jaunts - but now I've got it my days as a freighter captain are entering a new twilight phase.

What have you learnt most from the ships you fly? Did you power through the Lakons are have you chosen to remain a fighter or explorer for now?
I'm Cmdr TwingTwang, and this has been a trip to the Space Bar. Like, share, subscribe and Fly Casual!

Monday 30 March 2015

Elite Dangerous Outfitters - Classic Cobra

Hey space cadets, what is going on?
I'm Cmdr TwingTwang and welcome to the outfitters.

In this outfitters article we'll be looking at the classic cobra flown by Commander Jameson, and equipping a modern Cobra as a timeless tribute to embark on a star-seeing tour from Lave to Sol.

The exact specifications of Jamesons Cobra are going to be hard to match but I'll take everything I can into account and come up with a ship to be proud of. Outfitting a cobra on a budget can be a difficult so I'm not going to limit my spend on this.


This gives my a shopping list of features to consider as I put the ship together.

Its a rare luxury to go premium, but my starting point is a Class-A Cobra.
The 4A Power Plant provides enough juice for the 4A Thrusters, 4A Frame shift and 4A Shield Generator.  The Life support, Power couplings and Sensors are all upgraded to their maximum 3A too.


This ship already looks very premium,
4A - Power Plant
4A - Thrusters
4A - Frame Shift Drive
4A - Shield Generator
3A - Life Support
3A - Power Distributor
3A - Sensors

Internal Compartments
Now we are ready to start outfitting the vessel.  First on the list is a Large Cargo Bay. I'd say that 32 Tonnes sounds about right, so the two remaining size four internal compartments can have 4E Cargo Racks at sixteen tonnes each.

Fuel Scoops are not a problem, and in a premium ship the best I can buy is a Class 2A model so in it goes.

I'm certain that Commander Jameson had a docking Computer, so in it goes too.  And lastly I'm going to add a 1C Advanced Discovery Scanner into the last internal compartment.

Safety Features
Since Commander Jameson is known across the stars for his military lasers and missiles combo, I can't do anything other than a pair of D2 Gimbal Beams and two B1 Seeker Missile packs.

The must-have Electronic Countermeasures fill the first Utility Mount, and the second is going to be home to a Class-A Shield Booster.  Those extra shields keep the luxury feel, but push the power consumption over the top of the A-Rated plant.  When the hardpoints are deployed, the Frame Shift Drive, Docking Computer and Fuel Scoop will all disengage and power down.

To go with the flow I'm upgrading the Hull to Military Grade Composite too. Its reasonably cheap and feels like a good choice. The extra weight will drop my jump range down a tiny fraction, but I'm still going to be making those long 20Ly hops anyway

No mining?
I remember my original cobra sported a rear mining laser, which I could fit to one of the small hardpoints and swap the Discovery Scanner for a Refinery. However, I just don't see this as a resource extraction ship - it's a space-tourism build I'm going to use to see the galaxy a little so I'm grudgingly willing to sacrifice the refinery. Despite the premium build, there are some compromises I just have to make.
Were I optimising for long distance, then I'd replace the Docking Computer with an Auto Repair unit, but I'm happy to stop by several stations on my trip and won't be going to the outer rim territories in this ship. The Docking Computer fits the theme much better.

Energy Bomb? Galactic Hyperspace?
Sadly there are a few items on my shopping list that aren't available yet. I couldn't find the old thargoid-busting energy bomb for sale anywhere.
If I run out of stars to visit, I'll put in a feature request for the Galactic Hyperspace, but to be honest I think it'll be a while before its needed so I'm willing to omit that from this loadout.

One Last consideration.
For an iconic build like this, I'm going to have to choose a spray job that looks good, but I'll leave that for another time.  How would you paint a classic Cobra?

I think I want the colours of the Blue Rattler but in the pattern of the Cobra Serpent.? But I'm not sure. The striking Orange Ignition would be a great way to visit Sol in style, while the bright Orange Rattler has great visibility.
Perhaps I should go back to the original box art and choose the closest match?

I'm Cmdr TwingTwang, and I'll be flying this Classic Cobra on a convoy trip from Lave to Sol soon. Look me up if you want to come and get some photos taken with the stars!
Fly Casual everybody.

Monday 23 March 2015

Elite Dangerous Outfitters - The Vulture


Hey Space Cadets, What is going on?
I'm Cmdr TwingTwang and welcome to the Outfitters!

The Vulture is one of the newer ships and plenty of people have had their say about its handling, performance, price and whatnot. I'm not going to go into detail about the exact outfitting of the vulture as I've only flown it for a few hours and I don't have a handle on the options yet.


The role of the ship
The viper is a fun ship to fly, and the vulture turns all the dials up to ten providing a similar outfitting and flight experience.  Like the Viper, the Vulture suffers from an undersized reactor and you won't be able to power everything you want to so a good loadout is about compromising and specialising the ship.

This means there are decisions to make and you'll never be able to "Class-A" your Vulture all round, some systems will have lower ratings than others.  Outfitting a Vulture is going to become a matter of personal taste.

I've gone for Class-A Reactor and Power couplings, and Class-B Thrusters. Everything else could afford to shrink a size class to spare some power so I can squeeze in A4 shields too. There are plenty of options to play with, but those were my priorities on this build.

Safety Features
Being power limited you are likely to compromise on lower that top-spec shields, and since your vulture will be taking a lot of heat those shields will feel a lot weaker than they are.
With lower shields you won't be able to hang at medium range and slug it out with other ships while you exchange fire.  Sure, Eagles and Sidewinders won't be able to touch you but those big ships will tear you up at mid range. That means you have to choose between long-range and point-blank.

At long range, you have to rely on your big 5A Power Couplings to recharge your guns and shields enough to turn in for another pass before your opponent has recovered. Relentlessly lancing in and then boosting out engine-to-engine like this will wear down one of the bigger ships.

However at point blank range your turning circle just can't be beat, and this is where you will do a lot of your damage. Holding High-Six on an Anaconda thrusting down toward its engines will keep you out of a lot of fire arcs, and able to target any hardpoints that can cover. It'll also put its Power plant front and centre of your gimbals, for a devestating take down. Its only chance is to pull away to mid range and bring those big guns to bear, and when it does you'll either stay high on its stern or boost away to long range and prepare to lance in and find a good angle.

Exactly how you outfit the ship is going to depend on what your Wing are doing and your personal flying style.

Wingman Vulture
Since power is your currency I spent a lot of mine Gimbal Burst lasers.  The Gimbal burst lasers empty their banks quickly and get hot fast so aren't good for sustained fire, but they do reach a high damage per second while they fire and can either slam into shields or can be used to pick off modules on the enemy ship.  The sacrifice here is that you'll have weaker shields, as you've had to put a lot of power into weapons and that doesn't suit every situation.
The Vulture builds in a similar way to the Wingman Viper where I've put all of my power into weapons over shields.  Its just not a slugger and you are better off tagging and getting out than slugging away and relying on tanking shields.

Fixed beams are also out of the question.  I tried them for a while, they really pack a punch but you have to be a dedicated combat pilot to score reliable hits, and even then its much easier to target modules with gimbals. Because of this, I found I had a much higher effective damage with gimbals.
The power consumption of beams is also sky high, and you'll be sacrificing around 15% of your shield strength compared to burst lasers.

I'm discounting the other fixed weapons - Rail and Plasma - for the same reason that I didn't get on with fixed beams. The module tracking in gimbals is too much to sacrifice.

Hurting Bombs.
Being limited to two large hardpoints feels like it discounts running missiles. Missiles don't play to the strengths of the vulture, which excels at point blank range damage dealing. Missiles have their place on a less maneuverable ship when you have a six pack of them, or even quad-linked, but in a space superiority starfighter like the vulture it's a waste of hardpoints.
I also didn't see any Size-3 missiles for sale, so I'd be stuck with the same missiles I'd have on an Asp - minus four hardpoints - just not an option.

Frag Cannons cause me to worry about ammo limits, too. They still have have a quite high power drain, which is something we are trying to avoid. If you are flying fighter escort for a pair of T7s, then the powerful fraggers probably aren't your cup of tea.
I've dealt so much damage with A2 Fraggers in my Red Venom Viper which packs a huge punch for its size so these are super tempting.  If you are bounty hunting in a wing then speak to your CAG. It could be worth having one ship with frag cannons which excel at punching through those larger hulls. The high damage per second Frag Cannons are ideal at the point-blank range that suits the vultures flight characteristics.

Cannons will significantly reduce your power consumption giving you better shield options and still have reasonable ammo counts. With stronger shields you can get to point blank range and sit there scoring hit after hit.  You won't out damage those big ships, but can duck out of their fire arcs and keep the pressure up.
The fixed forward cannons are dirt cheap, and although you will pay over the odds for the turreted version they are highly recommended so you can target modules.

Multicannons are a popular option, although I didn't get a chance to try them. But they have a low power consumption and you would probably be able to equip one MC and one Beam, switching over after the beam has dropped some shields.

Overall, I can see this is a viable option - run one Beam/Burst laser and have your choice of Cannon, Multicannon or Frag Cannon on the secondary fire. I think this sort of combo will work really well in pairs too, where you can keep up the pressure by tagging on and off to stop your lasers overheating and then both open up the whole nine yards as soon as those shields drop.

Conclusions
Without doubt, I had most luck with dual Gimbal Burst lasers. This loadout is biased because I spent a lot of time in a combat zone and the ammo limits of the cannon were costly. They pack quite a punch against hulls and despite heating up quickly, as long as you fire in short controlled bursts they will keep dealing damage as long as you need them to.

Capable as a lone wolf or pack hunter, the Vulture has been more fun to fly than the Viper although as a small ship it has to be outfitted with a lot less than Class-A. It'll be interesting getting back into the cockpit of a smaller ship although I'm more than a little apprehensive in going up against a vulture. I'm looking forward to bringing the big guns of a Python against the Vulture, where it'll be touch-and-go whether I can keep the fighter out of my blind spot.

If you've got more to add on the Vulture, any tips on power management or how to get the most out of its shields I'd love to hear from you.
I'm Cmdr TwingTwang of the Alliance, Fly Casual everybody.

Saturday 21 March 2015

Elite Dangerous Rules of Acquisition - War profits

Hey Space Cadets, What is going on?
I'm Cmdr TwingTwang and welcome to the Rules of Acquisition.

I've just got back from the conflict at Lugh and wanted to make sure everybody who hasn't done their part gets over there and helps out.  This war won't be won without you, and even including the travel time from Leesti-Lugh this has been the highest Credit-per-hour experience I've had so far.

The four of us headed out there together, a Class-A viper, a top-spec combat cobra with me flying one of the two Vultures.  There are a few conflict zones to choose from in Lugh, and we flew out to Lugh-11 to rendezvous with the capital ship there. Even if you aren't a combat pilot the experience of an epic space battle is well worth the trip out and its a new splash of gameplay.

In a busy combat zone, you need a ship with staying power so you are talking about beams or burst lasers.  I'll have to write a separate outfitters article about the Vulture, I've tried a few different hardpoint options and the Pilots Choice award goes to Gimbal Burst lasers.

With a bit of practice I managed to reach about 1M Cr/H in bounty, and after a few hours cashed in the 12M reward I had earned.  This made it a 15M credit adventure taking a few hours. I really could have stayed out in the stars smoking fools all night but alas I decided to cash in the bounty and get back to civilised space.

The biggest point to be said, is that you can make 1M Cr/H in bounty in a combat zone, but the big 12M payout is available as a mission that you can do just the once. So this was an exercise in reaching that jackpot as soon as possible, then cashing it in and going home.

There are plenty of pilot tricks and combat training you can go through to deal the highest damage per second, but I'm going to leave those on the back shelf and talk about the profit bottom line - this is a Rules of Acquisition article not a Pilot Academy.   To reach the maximum profit, you need to tag as many ships as possible per hour.  You don't need to scrap the highest number of hulls, just contribute enough damage to register for the bounty and then switch targets.
This is where high power Burst Lasers really score well. The short controlled bursts needed to get credits for the kill won't overheat your weapons and will give you a few seconds to cool off and recharge before you hit the next ship.

Just like stopwatch-rares or high-volume freighting, I strongly recommend instrumenting your combat as seeing how much your ship is making. Having a stopwatch ticking away in your eyeline really helps you focus on that profit line. After your 30 or 60 minute limit is hit, check your bounty and try to beat that target.  Switch up your style and see if its led you to a higher or lower income.

The second step is to compare this figure to your trading totals.  E.g. If you are naturally a T7-Pilot, then you'd normally earn two million credits an hour plain sailing.  A Sixer will make a cool one million in the same time frame.  The bigger Fat-9 and Anacondas can carry hundreds of tonnes, and make a significant amount. So much that you don't fight in the war for money - and the profiteering advice doesn't really hold up.  If you drive a Lakon Fat-9 then you go to war for fun, its not about the money.
But I'm a T7 Pilot, so normally pull 2M without breaking a sweat and ended up taking about half that per hour in the combat zone.

A short (few hours) run at the conflict zone gave me a really high return, and while I coulda, woulda, shoulda, stayed there for hour after hour I realised that you can hit the 12M reward very quickly and cash out for a great hourly rate.  Any longer time I spent was likely be become less credit efficient, so stopping and switching back to my T7 was the right move for my bank balance.

So, back to war profiteering. Fighting the war costs me about 1M Cr/Hour.  Thats the profit and loss bottom line. And its not pretty.
One million in bounty, minus the two million lost from not trading, means I'm losing a Million Credits per hour.  However, I'm gaining a flat once-only fixed fee of twelve million.  So.. I could fight in the war for precisely twelve hours and break even.

Every minute after twelve hours is a net loss. Every minute less represents my war profit margins.

With that established, the quicker I can earn that twelve million and bail, the higher the profit margin in going to be.  Granted, I probably could have reached the fifteen million mark in fewer than fifteen hours, so continued to turn a profit for as long as I'd wanted.  But that sounds too much like hard work. This is an article about war profiteering - getting the highest income from the lowest effort, and that sweet spot seemed to be a few hours of awesome fun and a jackpot payout.

So that's my war profiteering, cold and calculating. I ran the numbers, smoked some fools and flew home with pockets full of gold.  If you have war stories, tactics, or profit numbers leave a comment - I'd love to hear from you.

I'm Cmdr TwingTwang, making money one war at a time. Fly casual Everybody.